Setup Development Environment
This section will guide you through the setup of your development environment to build software for the NAO robot and test your algorithms using our various tools.
Operating System
At HULKs, we mainly use Linux for development. If you're new to Linux, don't worry, at HULKs there are many people who can help you getting started.
Choosing the correct Linux Distribution
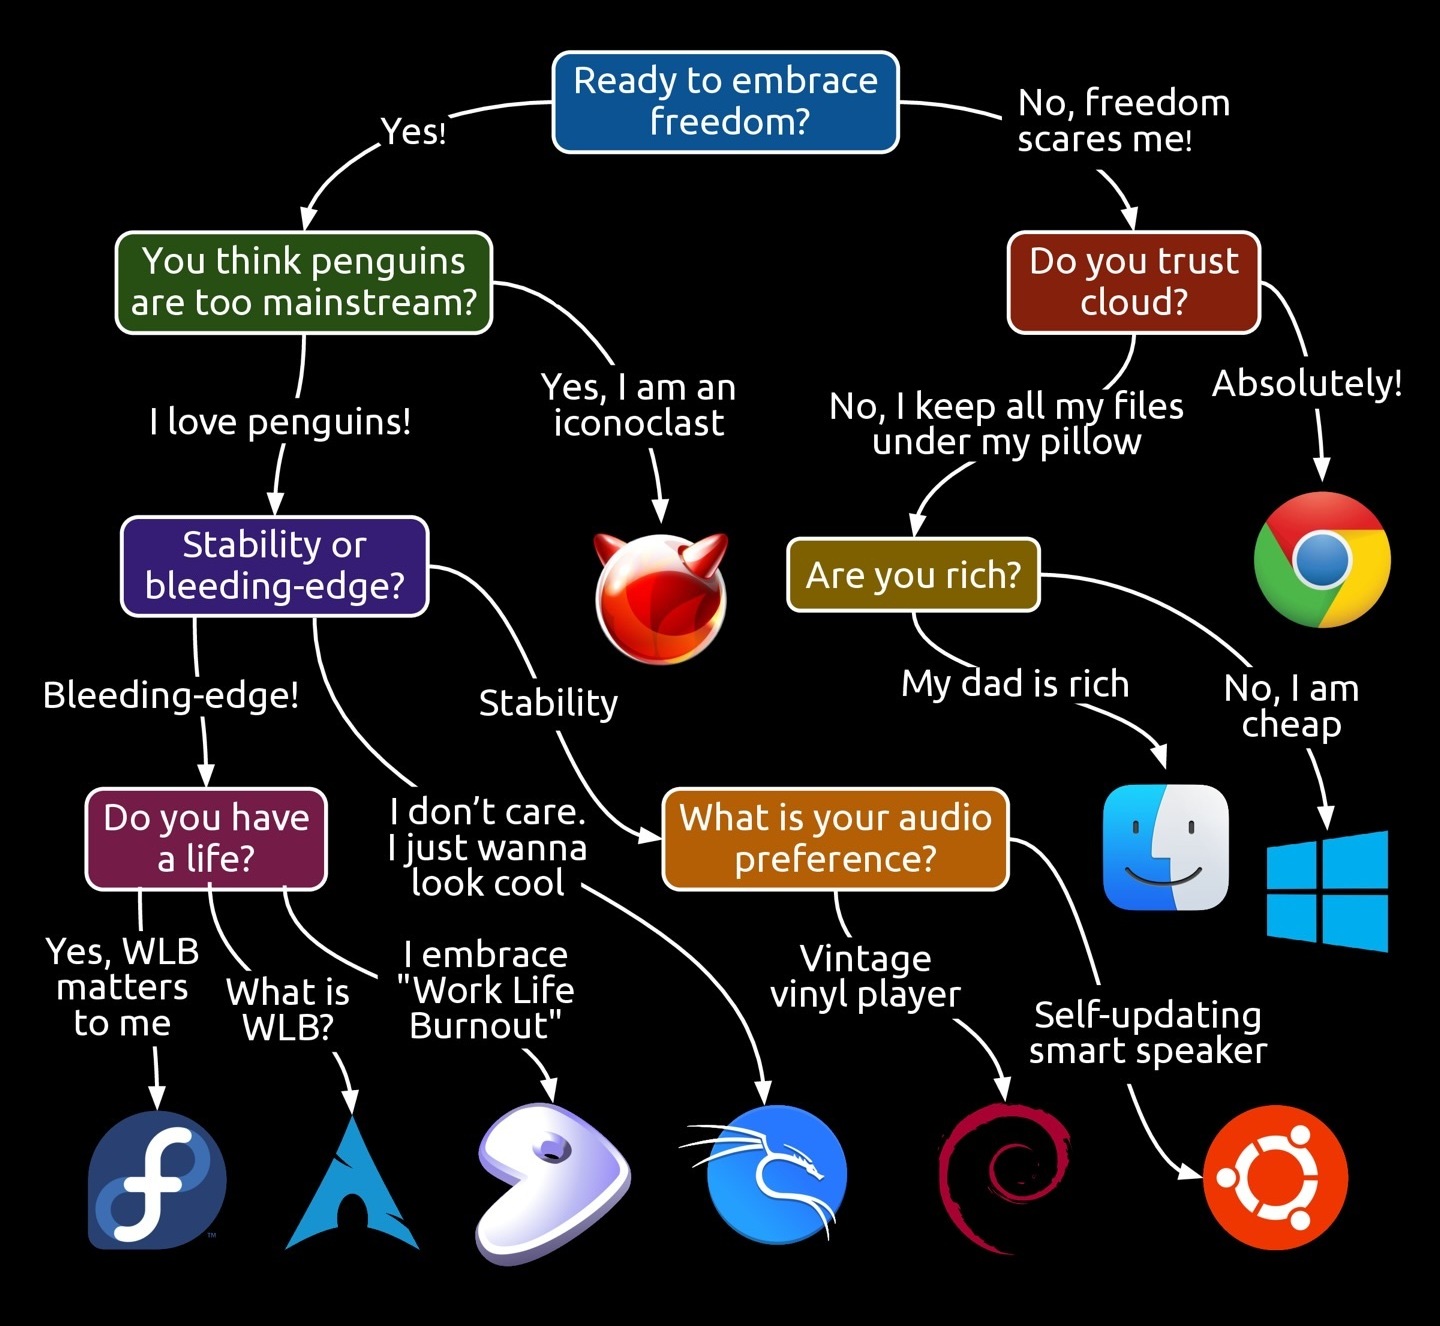
All joking aside, don't be persuaded to install Arch Linux, unless of course you want to delve into the depths of Linux and broaden your horizons.
Installing Rust
We require a latest stable release of the Rust toolchain to build our tools.
Visit https://rustup.rs/ for up to date instructions on how to install rustup for your machine.
Installing Dependencies
Our software requires a few dependencies to be installed before you can compile, upload, and run our code. Most of these dependencies are needed for the compilation of local tools. All dependencies needed for a cross-compilation for the NAO are included in the NAO SDK. Use your distribution's package manager to install the following dependencies:
If you are using a non-linux operating system (e.g. macOS or Windows), you additionally have to install docker.
If you want to use our simulator Webots
Usually, the Webots simulator is not needed for normal development. If you want to use it, you can install it with your packet manager or download it from the official website. You will also need to install the OpenVino™ runtime. The HULKs SDK already contains the runtime for use with the NAOs.
Inference runtime compatibility
The robot uses ONNX Runtime 1.22, CUDA 12.8, TensorRT 10.7, and cuDNN 9.7 from the existing container image.
The Rust workspace uses ort rc.13 with api-21.
Do not enable its default features or api-22 and newer without revalidating the runtime.
Automatic device selection enabled by api-22 aborted in the ONNX Runtime 1.22 CPU build during local validation.
Use GraphOptimizationLevel::All to retain rc.10's Level3 behavior.
In rc.13, Level3 selects ORT_ENABLE_LAYOUT, which ONNX Runtime 1.22 rejects with graph_optimization_level is not valid.
hulk-runtime.container sets both ORT_DYLIB_PATH and LD_PRELOAD to /usr/local/lib/libonnxruntime.so.
Preloading is required for the rc.13 shutdown order: its environment must be released before ONNX Runtime's C++ destructors.
Loading only through ORT_DYLIB_PATH produced a heap-corruption abort on process exit with the Linux x64 ONNX Runtime 1.22 build, even with only a session builder and no inference.
pepsi gammaray uploads the container definition before reloading systemd, restarts hulk-runtime.service to recreate the container, and then ensures HULK is started.
Systemd stops HULK before its runtime through the service's Requires= and After= dependencies.
Run this setup before deploying the upgraded binaries.
This does not require a new image or a CUDA upgrade.
Verify startup and shutdown on the robot, including GPU provider selection and model inference, before rollout.
Local CPU validation does not cover Jetson CUDA or TensorRT execution.
For local dynamic-loading runs, set both variables to the same absolute library path.
Cloning the Repository
We use Git to manage all our software.
Git Setup: If you haven't used Git before
Git is a free and open source distributed version control system.
First, install Git (see above).
The second thing you should is to set your user name and email address. This is important because every Git commit uses this information, and it’s baked into the commits you start creating:
And third, setup authentication with GitHub You can access and write data in repositories on GitHub.com using SSH (Secure Shell Protocol). When you connect via SSH, you authenticate using a private key file on your local machine. You can follow this guide to generate and add a key to GitHub. If you already have a key, you can skip the part about generating a new one, and simply add your existing key to GitHub.
To download the repository, run git clone https://github.com/hulks/hulk.git in the terminal.
Tip
It's common to not do this in your home directory, but in a separate folder.
Most people use a ~/worktree directory for this.
To create this, run mkdir ~/worktree and then cd ~/worktree.
Now you can execute the git clone command from above.
Build Pepsi
Pepsi is our main tool to interact with the repository, configure NAOs, and upload the software to the robot. For a more in depth overview and introduction to Pepsi, consult [../tooling/pepsi.md].
For now, it is sufficient to know that Pepsi takes care of building the source code and also uploading it to the NAO. This includes downloading and installing the SDK.
To build and run Pepsi from source, use
This downloads and builds all dependencies for the workspace and displays the help page of Pepsi.
The launcher builds Pepsi natively in target.
SDK container builds use target/container so they can reuse their Cargo cache independently of native builds.
See Pepsi build directories for overrides and binary locations.
Tip
You can also install Pepsi into your local system to conveniently use it without rebuilding:
Pepsi is subsequently installed at ~/.cargo/bin/pepsi.
Don't forget to update it from time to time by reinstalling it to get the latest features and bugfixes.
The same can also be done for twix, our debug tool.